Automated Code Deployment

Tasks for this Blog
- Creating CodeDeploy application and deployment group.
- Modifying buildspec.yml to include additional components needed for deployment.
- Application Deployment to test server.
Prepare environment for Testing
- Run the CloudFormation stack from the AWS Labs Devops Workshop using the following AWS CLI command:
user:~/environment/aspirenxtRepo (master) $ aws cloudformation create-stack –stack-name DevopsWorkshop-Env \
–template-body https://s3.amazonaws.com/devops-workshop-0526-2051/v1/02-aws-devops-workshop-environment-setup.template \
–capabilities CAPABILITY_IAM
The Stack will have a VPC w/ 1 public subnet, an IGW, route tables, ACL, 2 EC2 instances. Also, the EC2 instances will be launched with a User Data script to automatically install the AWS CodeDeploy agent.
Create CodeDeploy Application and Deployment group
- Run the following to create an application for CodeDeploy.
user:~/environment/AspireRepo (master) $ aws deploy create-application --application-name DevOps-WebApp

- Run the following to create a deployment group and associates it with the specified application and the user’s AWS account. You need to replace the service role with DeployRoleArn Value we created using roles CFN stack.
user:~/environment/AspireRepo (master) $ echo YOUR-CODEDEPLOY-ROLE-ARN: $(aws cloudformation describe-stacks --stack-name DevopsWorkshop-roles | jq -r '.Stacks[0].Outputs[]|select(.OutputKey=="CodeDeployRoleArn")|.OutputValue')
-
user:~/environment/AspireRepo (master) $ aws deploy create-deployment-group --application-name DevOps-WebApp \
--deployment-config-name CodeDeployDefault.OneAtATime \--deployment-group-name DevOps-WebApp-BetaGroup \--ec2-tag-filters Key=Name,Value=DevWebApp01,Type=KEY_AND_VALUE \--service-role-arn <<REPLACE-WITH-YOUR-CODEDEPLOY-ROLE-ARN>>
We are using the tags to attach instances to the deployment group.
-
- Let us review all the changes by visiting the CodeDeploy Console.
Prepare application for deployment
- Without an AppSpec file, AWS CodeDeploy cannot map the source files in your application revision to their destinations or run scripts at various stages of the deployment.
- Copy the template into a text editor and save the file as appspec.yml in the AspireRepo directory of the revision.
version: 0.0
os: linux
files:
– source: /target/javawebdemo.war
destination: /tmp/codedeploy-deployment-staging-area/
– source: /scripts/configure_http_port.xsl
destination: /tmp/codedeploy-deployment-staging-area/
hooks:
ApplicationStop:
– location: scripts/stop_application
timeout: 300 BeforeInstall:
– location: scripts/install_dependencies
timeout: 300 ApplicationStart:
– location: scripts/write_codedeploy_config.sh
– location: scripts/start_application
timeout: 300 ValidateService:
– location: scripts/basic_health_check.sh
As a sample shown below:

- Review the script folder in the repo for the various scripts like Start, Stop, health check etc. These scripts will be called as per the hook definition in appspec.yml file during deployment.
- Since we are going to deploy the application via CodeDeploy, we need to package additional files needed by CodeDeploy. Let us make change to the buildspec.yml to incorporate the changes.
version: 0.1
phases:
install:
commands:
– echo Nothing to do in the install phase…
pre_build:
commands:
– echo Nothing to do in the pre_build phase…
build:
commands:
– echo Build started on `date`
– mvn install
post_build:
commands:
– echo Build completed on `date`artifacts:
files:
– appspec.yml
– scripts/**/*
– target/javawebdemo.war
- Save the changes to buildspec.yml.
- Commit & push the build specification file to repository
user:~/environment/AspireRepo/ $ git add buildspec.yml
user:~/environment/AspireRepo/ $ git add appspec.yml
user:~/environment/AspireRepo/ $ git commit -m "changes to build and app spec"
user:~/environment/AspireRepo/ $ git push -u origin master
Deploy an application revision
- Run the start-build command:
user:~/environment/AspireRepo (master) $ aws codebuild start-build --project-name devops-webapp-project
- Visit the CodeBuild Console to ensure build is successful. Upon successful completion of build, we should see new WebAppOutputArtifact.zip upload to the configured CodeBuild S3 Bucket.
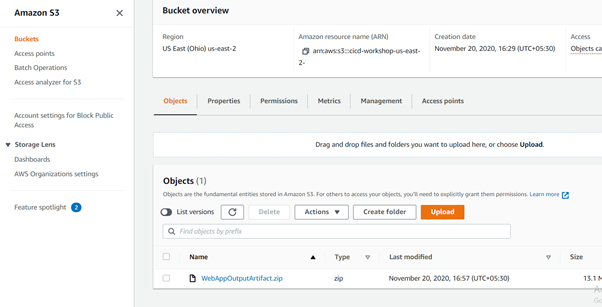
- Get the eTag for the object WebAppOutputArtifact.zip uploaded to S3 bucket. You can get etag by visiting S3 console. Or, executing the following command.
user:~/environment/AspireRepo (master) $ echo YOUR-S3-OUTPUT-BUCKET-NAME: $(aws cloudformation describe-stacks --stack-name DevopsWorkshop-roles | jq -r '.Stacks[0].Outputs[]|select(.OutputKey=="S3BucketName")|.OutputValue')
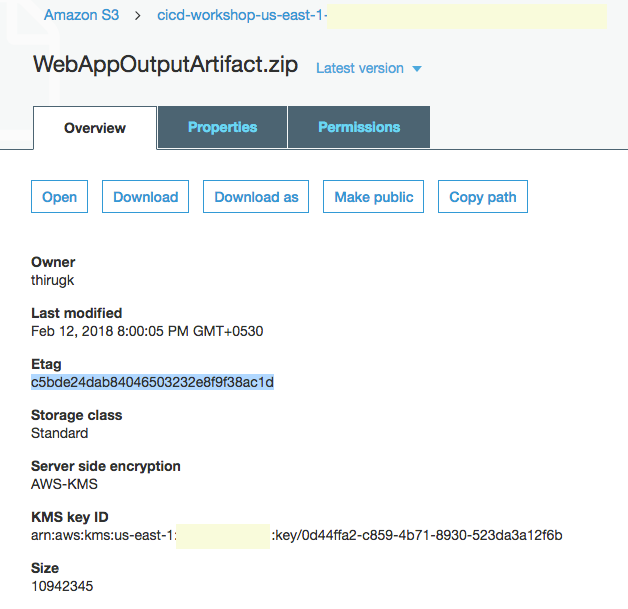
user:~/environment/AspireRepo (master) $ aws s3api head-object --bucket <<REPLACE-YOUR-S3-OUTPUT-BUCKET-NAME>> \
--key WebAppOutputArtifact.zip
As a sample S3 properties console showing etag below:
- Run the following to create a deployment. Replace <> with your S3 bucket name created in Lab 1. Also, update the eTag based on previous step.
user:~/environment/AspireRepo (master) $ aws deploy create-deployment –application-name DevOps-WebApp \
–deployment-group-name DevOps-WebApp-BetaGroup \
–description “My very first deployment” \
–s3-location bucket=<<REPLACE-YOUR-S3-OUTPUT-BUCKET-NAME>>,key=WebAppOutputArtifact.zip,bundleType=zip,eTag=<<REPLACE-YOUR-ETAG-VALUE>>
- Confirm via IAM Roles, if associated EC2 instance has appropriate permissions to read from bucket specified above. If not, you will get Access Denied at the DownloadBundle step during deployment.
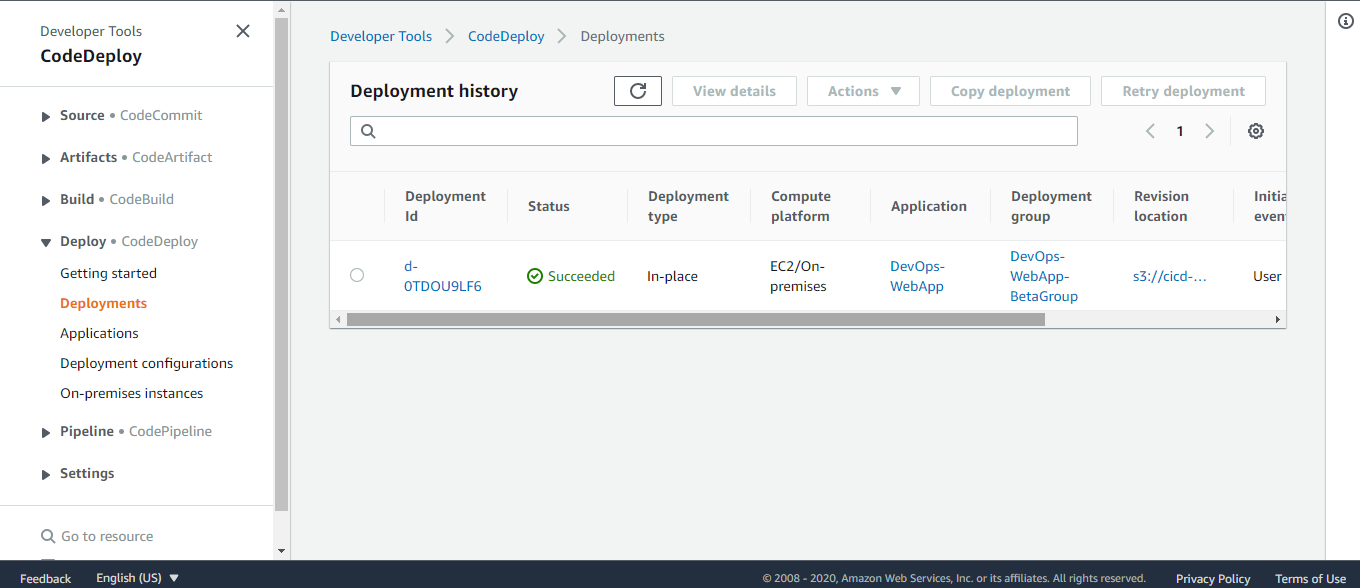
- Verify the deployment status by visiting the CodeDeploy console.
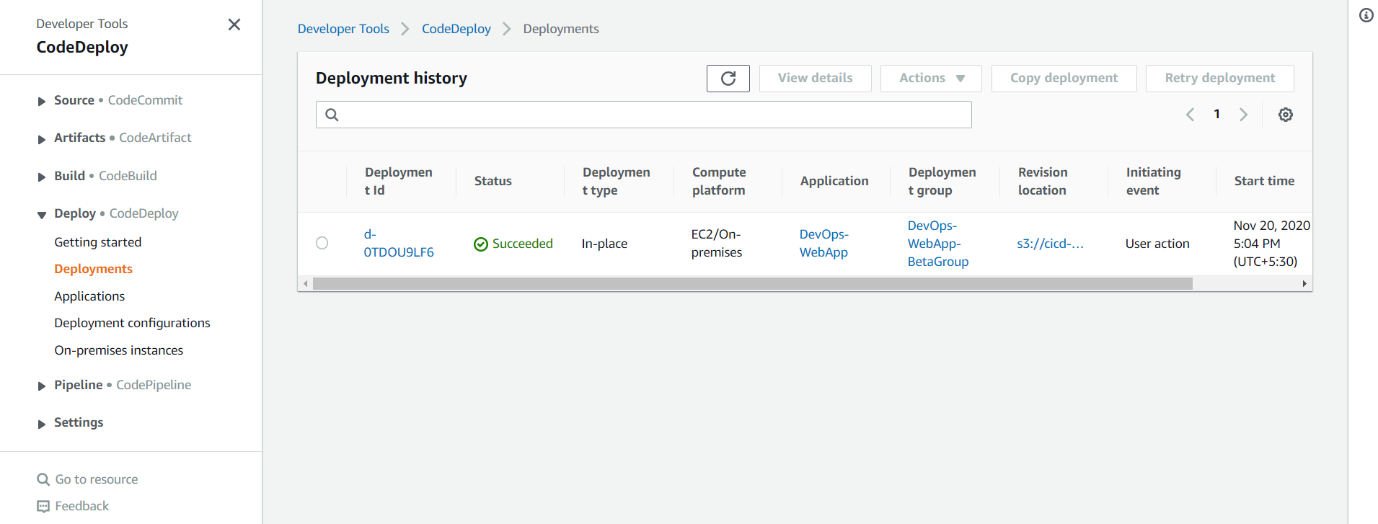
- Check the deploy console for status. if the deployment failed, then look at the error message and correct the deployment issue.
- if the status of deployment is success, we should be able to view the web application deployed successfully to the EC2 server namely DevWebApp01
- Go to the EC2 Console, get the public DNS name of the server and open the url in a browser. You should see a sample web application.