

Sharing File System between EC2 Instances using AWS EFS

Network File System (NFS) is a protocol for distribution of files over the network which lets us share the file system on more than one server.
Conventionally, we had to involve multiple teams and would take a lot of time and effort to create NFS. However, on AWS, we can get it done in a few minutes with their EFS (Elastic File System) service.
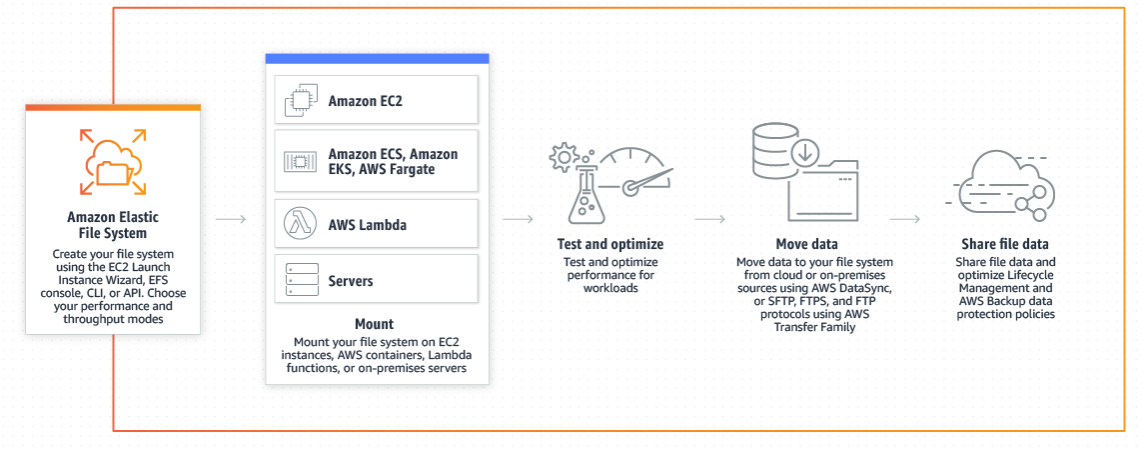
Amazon Elastic File System (Amazon EFS) provides a simple, serverless, set-and-forget, elastic file system that lets you share file data without provisioning or managing storage. It can be used with AWS Cloud services and on-premises resources and is built to scale on demand to petabytes without disrupting applications. With Amazon EFS, you can grow and shrink your file systems automatically as you add and remove files, eliminating the need to provision and manage capacity to accommodate growth.
A quick illustration give below was taken from the AWS to understand how it works.
Some of the EFS advantages are:
- Fully managed by AWS.
- Cost Effective
- Highly Available, Durable and Scalable
- POSIX-compliant shared file storage
- Highly Secure and Compliant
We’ve two EC2 Ubuntu instances running, and in this blog, we’ll create one EFS and then mount the same one on both the EC2 Instances.
Create an EFS
The steps to create an EFS File System are as under:
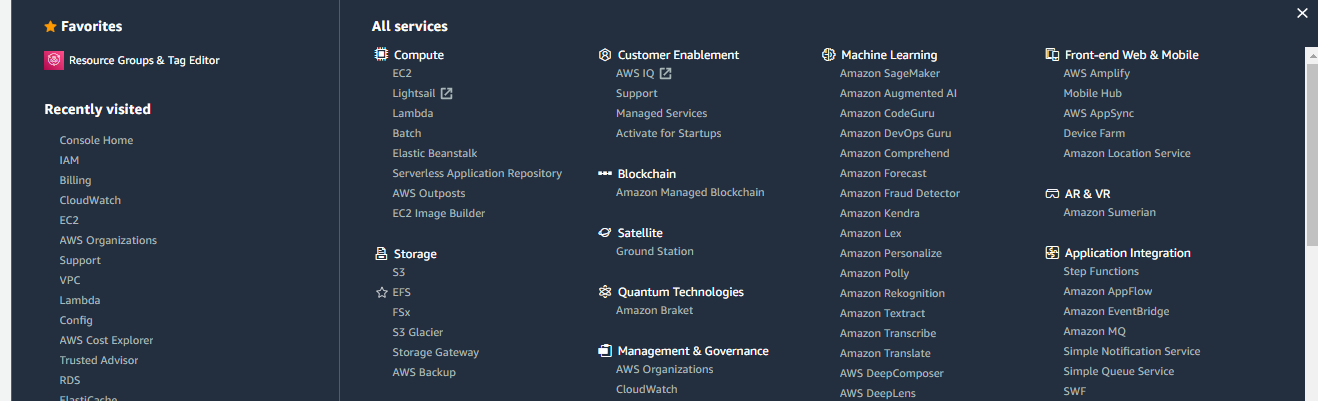
Step 1: Login to AWS console and select EFS under Storage, in AWS Services.
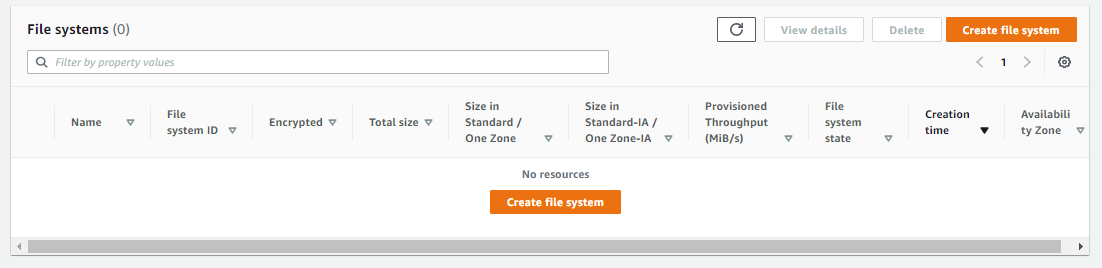
Step 2: Next, click on “Create File System”. AWS will automatically assign an IP address in the availability zone, but we can change it if required
Step 3: Now, we need to optionally enter the name of File System and either click on Create; which will take the default settings; or click on Customize to do the changes like IP Address.
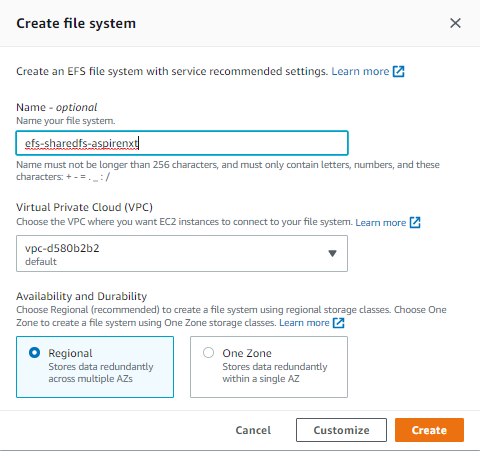
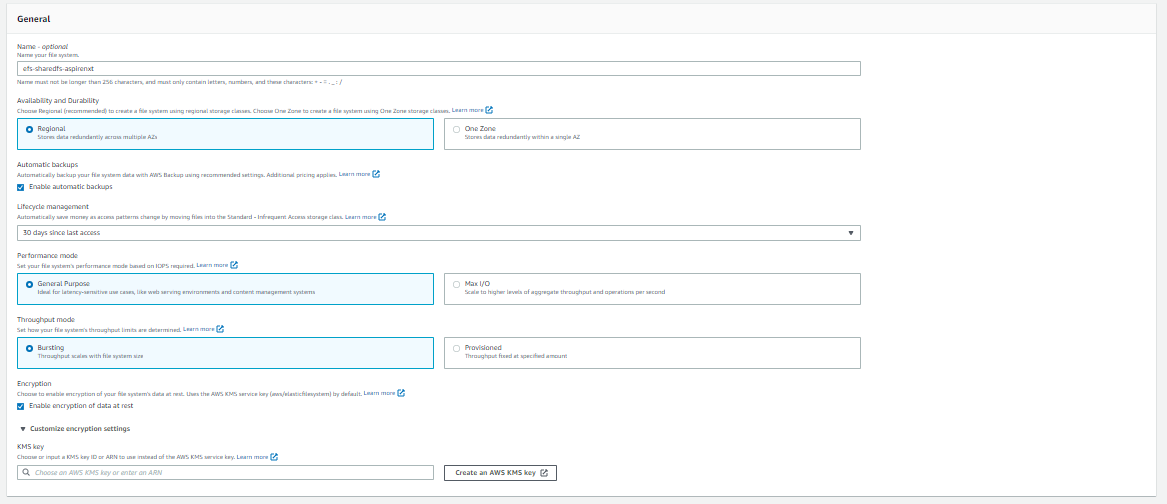
Step 4: If we click on Customize, we will get the below screen wherein we can setup Automatic Backups, Performance, Throughput and Encryption; along with Tagging under File System Settings and Click on Next.
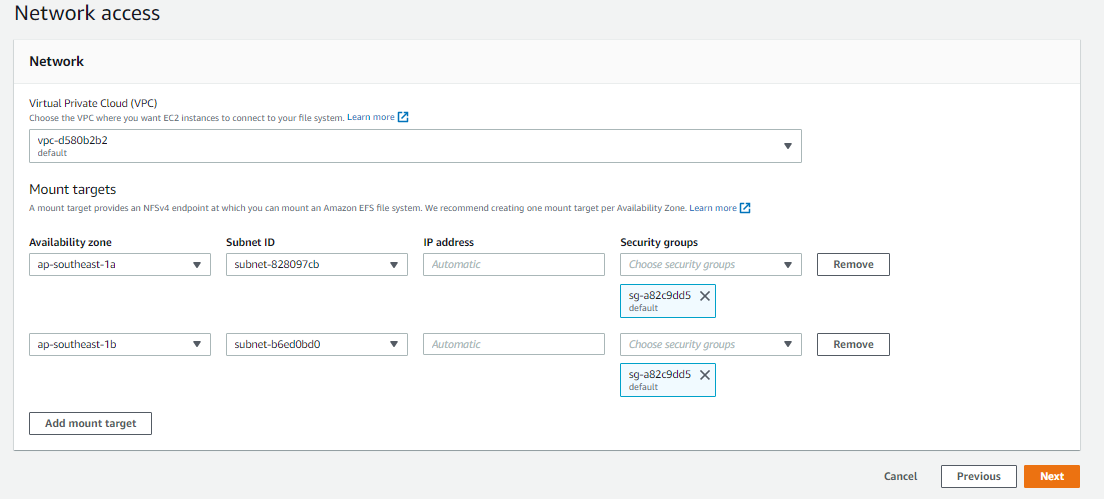
Step 5: Now, we can customize the Network Settings under Network Access. Here, we can setup the VPC, Security Groups, Subnets, IP Addresses for each AZ as a Mount Target. Then, click on Next to setup the File System Policy.
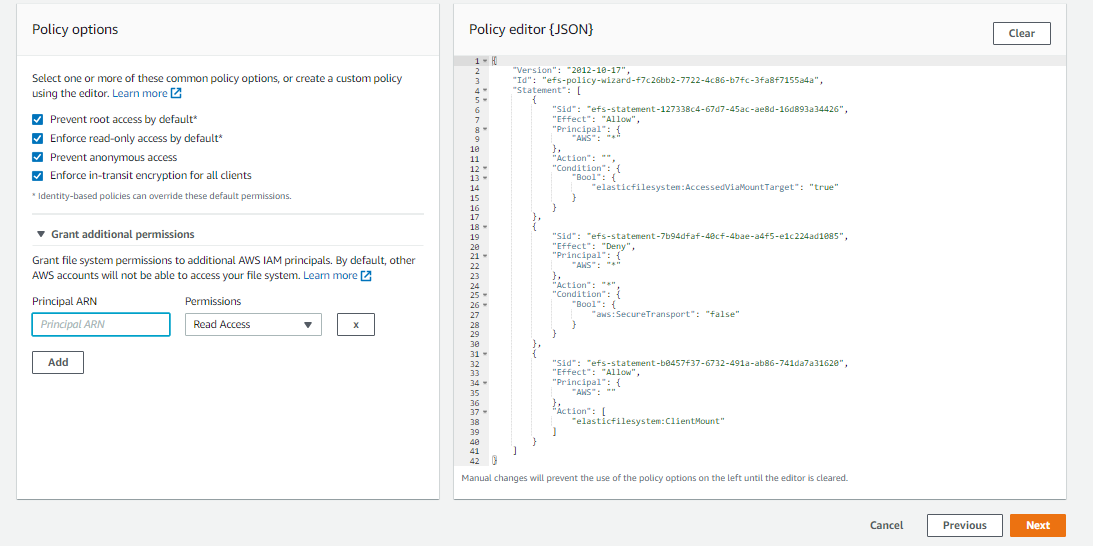
Step 6: We can enforce a policy based on our preference using some available policy options or customized based on our requirements. Then, click on Next.
Step 7: Now, we can Review the configuration, and if all is okay, then click on “Create File System.” It may take a few seconds, and once done, we will get a success message and now, we will be able to see newly created an elastic file system on the list. Now, the EFS is ready to be mounted on EC2 instances.
![]()
Mounting EFS on EC2
The first thing we need to ensure is that the NFS Client is installed in the EC2. The steps to mount the created EFS on to EC2 are as under:
Step 1: Login to both EC2 instances and install the NFS client. For Ubuntu, we will use the following:
apt-get install nfs-common
Step 2: Next, create a folder in the EC2 Instance, where we want to mount the EFS. Please ensure that the NFS port 2049 is allowed in the EC2 Instance Security Groups Inbound Rules.
cd /
mkdir apps
Step 3: Now, Mount the file system with the command given below:
mount -t nfs4 -o nfsvers=4.1,rsize=1048576,wsize=1048576,hard,timeo=600,retrans=2 fs-4fd14a06.efs.us-east-1.amazonaws.com:/ apps
Step 4: Now, we can use the following command to check if /apps is mounted:
root@ip-192-168-1-138:/# df -h | grep apps
fs-5ef23b15.efs.us-east-1.amazonaws.com:/ 8.0E 0 8.0E 0% /apps
root@ip-192-168-1-138:/#
Step 5: Next, repeat steps 1 through 4 on the other EC2 Instance
Step 6: Now, to verify, we can mount the EFS on another server and can see if /apps are accessible on both servers.
root@ip-192-168-1-130:/apps# df -h | grep apps
fs-5ef23b15.efs.us-east-1.amazonaws.com:/ 8.0E 0 8.0E 0%
/apps root@ip-192-168-1-130:/apps#
Conclusion
Amazon EFS offers you the choice of creating file systems using Standard or One Zone storage classes. Standard storage classes store data within and across multiple availability zones (AZ). One Zone storage classes store data redundantly within a single AZ, at a 47% lower price compared to file systems using Standard storage classes, for workloads that don’t require multi-AZ resilience.
Amazon EFS offers four storage classes: two Standard storage classes, Amazon EFS Standard and Amazon EFS Standard-Infrequent Access (EFS Standard-IA), and two One Zone storage classes, Amazon EFS One Zone, and Amazon EFS One Zone-Infrequent Access (EFS One Zone-IA).
Amazon EFS is designed to provide massively parallel shared access to thousands of Amazon EC2 instances, and AWS containers and serverless compute services including Amazon Elastic Container Service (ECS), Amazon Elastic Kubernetes Service (EKS), AWS Fargate, and AWS Lambda, enabling your applications to achieve high levels of aggregate throughput and IOPS with consistent low latencies.
Amazon EFS is well suited to support a broad spectrum of use cases from home directories to business-critical applications.


